
How to Install the PG Unicorn Clear Psycho Frame: Step-by-Step Guide + LED Pairing Tips
TakaraModel
How to Install the PG Unicorn Clear Psycho Frame: Step-by-Step Guide + LED Pairing Tips Full disassembly sequence, Clear vs. Light-Guide handling, cable routing, and verification checklist
Quick Reference
▸ Skill Level: Intermediate
▸ Estimated Time: 4–8 hours
▸ Kit Required: Bandai PG 1/60 Unicorn (sold separately)
▸ LED Kit: Optional but recommended for Light-Guide version
What You'll Need
Essential Tools
- Sprue cutters — sharp, flush-cut recommended
- Fine-tip tweezers — for PMMA part handling
- Sanding sticks — 400 / 600 / 800 grit for gate cleanup
- Hobby knife / panel line scribe
- Soft microfiber mat — to protect clear parts during assembly
Optional but Recommended
- Matte clear coat (Tamiya TS-80) — for Clear version light diffusion
- PG 1/60 compatible LED kit — for Light-Guide version illumination
- Plastic-safe lubricant — for joints needing adjustment
- Magnifying lamp — for PMMA gate work
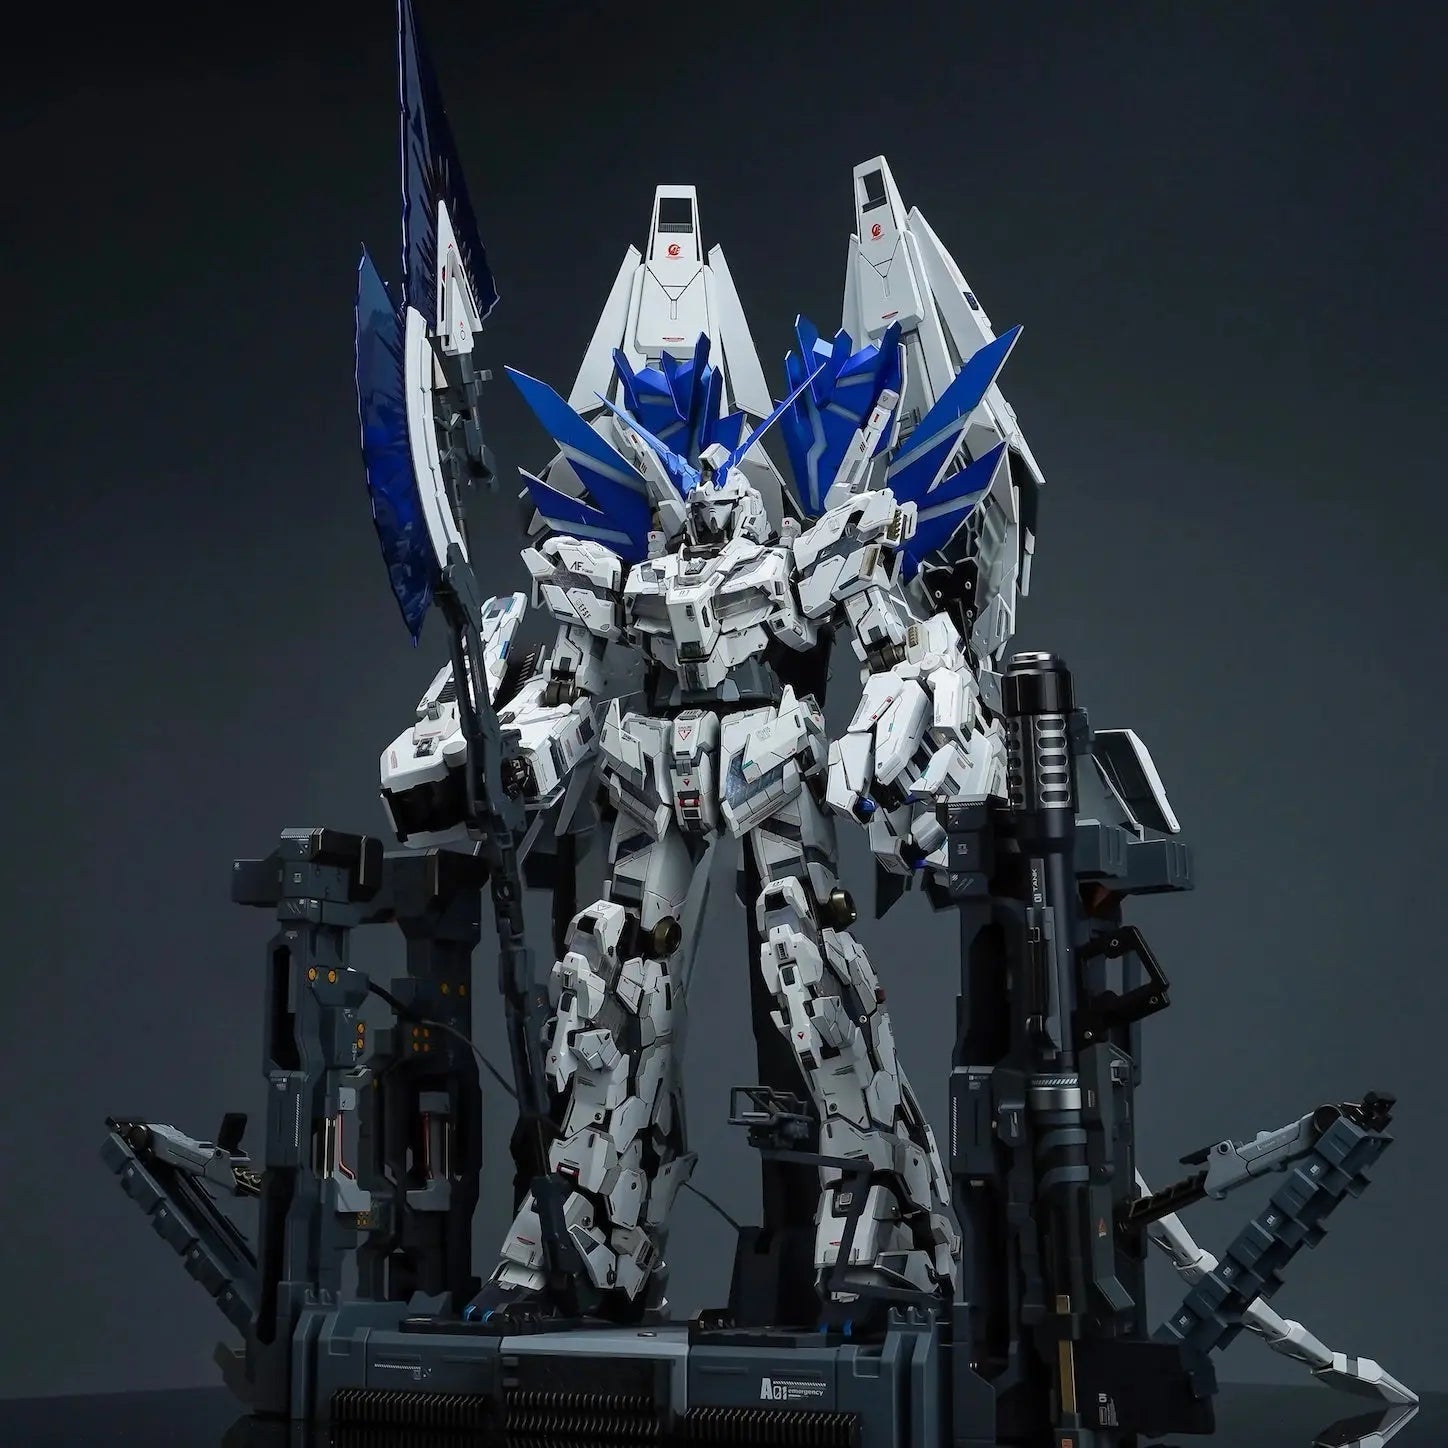
Before You Start: Know Your Version
Clear Version
- Handle with cotton gloves — PMMA shows fingerprints immediately
- Gate marks are more visible — sand to 1000 grit in visible areas
- Optional: Apply matte varnish to inner panel faces before assembly for diffused LED effect
Light-Guide Version
- Milky-white opal surface — gate marks less visible, fingerprints less of a concern
- No pre-treatment needed — install as-is
- LED placement tip: plan a small air gap between LED and frame surface for optimal diffusion
Phase 1: Disassembly
Work from extremities inward. Follow this order:
- Step 1: Remove armor panels — start with hands, feet, lower legs; work inward
- Step 2: Open torso section — remove chest armor and cockpit hatch to expose the upper frame
- Step 3: Separate the hip block — the pelvis joint bears the most stress; work carefully
- Step 4: Remove leg assemblies — separate at hip, then knee, then ankle
- Step 5: Remove shoulder and arm assemblies last
Tip: Store original psycho frame parts in labelled bags — useful for reference or future restoration.
Phase 2: Frame Replacement
Torso Core Frame
- Release clip-in panels using a flat spudger or the back of a hobby knife
- Test-fit replacement panels in both Unicorn Mode and Destroy Mode positions before committing
- Apply even pressure during clip-in to avoid stress fractures in PMMA
Head Unit
- The NT-D horn split mechanism runs through the head frame — verify it moves smoothly after replacement
- Reassemble head armor only after confirming the transformation cycle functions correctly
Arms and Legs
- Replace panel by panel, proximal to distal (shoulder/hip → wrist/ankle)
- Elbow and knee joints are under the most mechanical stress — ensure full seating
- For Light-Guide version: leave planned LED gaps at knee and elbow sections
Phase 3: LED Kit Integration (Light-Guide Version)
LED Kit Selection Criteria
- 8+ LED segments for full-body coverage across all frame sections
- Color options: Red (Unit 01 standard) / Gold (Banshee/Phenex) / Green (Final Battle) / custom
- Wireless or concealed battery pack — no external wires visible in final display
Cable Routing Sequence
- Torso core: Main battery/controller connects here — the routing hub for all branch cables
- Chest → head: Upper body LEDs thread through the neck channel
- Chest → hip: Main trunk cable passes through the torso-pelvis connection
- Hip → legs: Branch cables route into each leg's internal channel
- Shoulder → arms: Smallest runs — route before closing shoulder armor
Route all cables before closing final armor panels. Secure with model-safe tape during routing — no permanent adhesive until circuit is verified.
Phase 4: Reassembly and Final Verification
Reassemble in reverse order — limbs before torso, torso armor last. Then verify:
- ✓ All clear/light-guide frame panels fully visible in Destroy Mode
- ✓ NT-D transformation cycle smooth with no binding or resistance
- ✓ Full LED circuit test with kit in both Unicorn Mode and Destroy Mode
- ✓ No armor panel gaps or misalignments
- ✓ All joints hold poses without sagging
Common Issues and Solutions
- ▸ Panel won't seat fully: Lightly sand the peg/tab with 600 grit. PMMA tolerances are slightly tighter than ABS — never force-fit.
- ▸ Clear version LED hot spots: Apply a thin matte varnish coat to the panel's inner face and dry fully, or insert a thin diffuser film between LED and frame.
- ▸ Light-Guide dark areas: The material diffuses light from the side/edge — if the LED is pressing directly against the surface, move it back slightly to restore diffusion.
- ▸ Stiff transformation after install: Check for cable routing that may be catching. The PG Unicorn's mechanism requires approximately 2–3mm of panel travel clearance.
- ▸ PMMA part cracked during assembly: Contact Takara Model Studio for replacement. Use PMMA-compatible adhesive only — standard model cement is not compatible.
Frequently Asked Questions
Q: How long does the full installation take?
Plan for 4–8 hours depending on your starting state. If working from an already-assembled kit, add 1–2 hours for disassembly and part organization. Installing during initial assembly is easier and recommended if you're starting fresh.
Q: Can I install this on a partially assembled PG Unicorn?
Yes — in fact, installing during assembly is easier than retroactively replacing a completed kit's frame. If your kit is partially assembled, disassemble only the sections you need to reach, replace the frame parts in those sections, and reassemble before moving on.
Q: What LED kit do experienced builders recommend?
Look for kits with at least 8 LED points and separate control per body section. Color temperature matters: warm white produces a gold-toned glow; cool white gives blue-white; purpose-built red/green/gold LEDs are available for anime-accurate colors by variant. Rechargeable battery packs are preferred for long-term display use.
Q: What's the difference between Clear and Light-Guide for LED pairing?
The Clear version transmits light directly and shows individual LED positions more visibly — good for accent lighting or photography. The Light-Guide version diffuses light across the entire panel surface for a uniform glow — this is the anime-accurate effect and the better choice for display illumination. If you're adding LEDs, Light-Guide is recommended.
Q: Does this work with third-party PG Unicorn kits (Daban, Dragon Momoko)?
Most builders report no issues with major third-party PG Unicorn kits. Minor tolerance variations may mean light sanding of peg connections is occasionally needed. The kit is designed for Bandai's original 1/60 PG Unicorn tooling; compatibility with third-party kits is good but not guaranteed for all revisions.
Q: Is this an official Bandai product?
No. This is an independently produced aftermarket replacement kit by Takara Model Studio. It is not affiliated with Bandai Spirits. The PG Unicorn base kit is a separate Bandai product sold independently.
This is an independently produced replacement kit. It is not affiliated with Bandai Spirits. LED kits are sold separately. Takara Model Studio cannot be held responsible for damage resulting from improper installation.